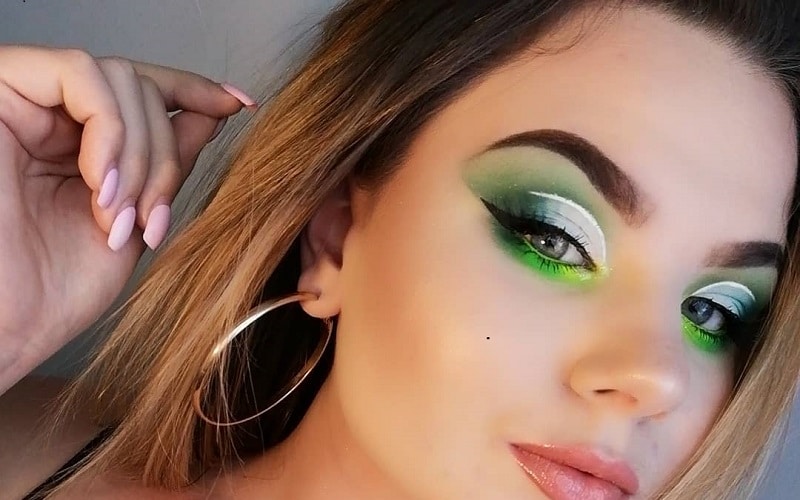
Applying and blending eyeshadow to perfection is no piece of cake. It takes some serious amount of practice to get things right and become a pro at it with time. It’s not like you will perfectly get the hang of applying eyeshadow within the first few days, with constant practice and learning, the process becomes much easier to follow. Also, nobody is born an artist, every person has to start the learning process from the very beginning and as you practice, you keep getting better and better each time. The most important part of applying matte eyeshadow is blending, it’s crucial to get this step right or else it’s nothing but a disaster.
Working with shimmery eyeshadow is considerably easy, given the fact that they are super creamy in texture. On the contrary, matte eyeshadow can be a little too tricky to work with especially when you are new to this thing. But there’s nothing to worry about, with time and practice you certainly will get better and in no time, you will become a pro at applying matte eyeshadow.
To make the learning process a bit easier for you, we have listed some easy steps that will help you in acing the technique of applying matte eyeshadow.
Apply primer to your lids

Applying primer to your lids is one of the most crucial steps to follow. Primer helps in providing a soft and smooth canvas for the application of the product and it also makes the eyeshadow look more pigmented and vibrant. Before putting on the primer, apply a tiny bit of eye cream all over your lids as well as the under-eye area to keep them well hydrated and moisturized, doing so will help in preventing eyeshadow creasing. Additionally, the primer also increases the staying hours of the product.
Use a neutral color for the base

Following the use of a primer, apply a neutral color eyeshadow to your entire lid. Use the lightest shade from your eyeshadow palette and apply it all over your lid to make a solid base for the eye look you’re trying to create. And that’s not just it, nude eyeshadow will also help to make the other applied eyeshadows look more also prominent and refined, it will also help to conceal any discoloration that you might have on the lids. Just make sure to blend the neutral eyeshadow evenly.
Define your crease

To make your eyes look more defined, create a crease on the lids. This is the first and crucial step to creating your preferred eye look. Pick a shade that is slightly darker than the neutral shade that you applied as a base. Apply it all over your lid using very light hand movement with the help of a fluffy brush. At first, start by taking very little color on the base of the brush and gradually intensify the color as it suits you.
Color your lids

After you are done creating crease, pick a color from the eyeshadow palette that is slightly lighter than the color applied on the crease. You can use the same brush that you used for the crease. Fill your entire lid using the color you picked and make sure to blend it nicely along with the crease as well so as to eliminate any kind of harsh lines. Also, you will have to be super quick when you blend the eyeshadows as matte ones tend to settle on to your skin very quickly and this can make your eyeshadow look uneven and harsh.
Add finishing touches

Now that you are done with your eyelids, it’s time you divert your focus to your lower lashline as well. To make your eye makeup look complete, it’s crucial to take things to the lower part of your eyes as well. Take the same eyeshadow that you applied on the lids and apply it to your lower lashline using an angled brush. Blend the eyeshadow evenly and after that, take your mascara and apply a few coats of the product to make your eyes look more defined and dramatic.